All zipped up!
I’ve been deep stash diving for this make. This lovely doubled-sided wool was purchased many, many, many years ago at The Fabric Store in Melbourne with a short jacket in mind. It feels so good to have finally sewn it up.
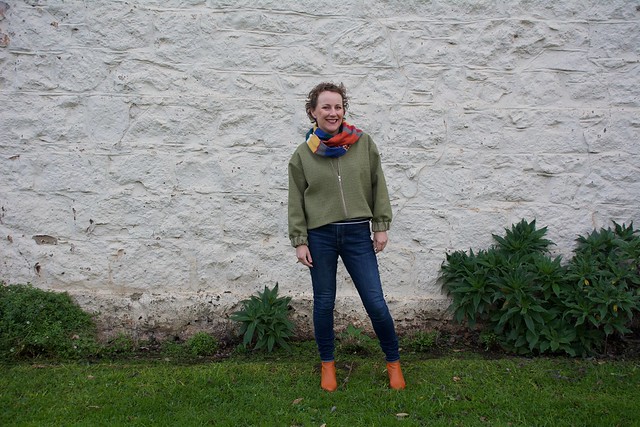
My idea of a short jacket was re-interpreted as cropped, boxy, unlined jacket from a Japanese pattern book for #sewjapaneseinjuly.
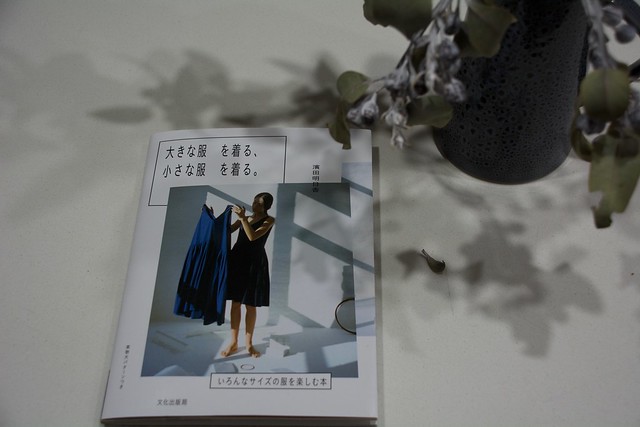
I think this Japanese pattern book might become my favourite. Each pattern comes with two versions – oversized and a true-to-size. The true-to-size has two sizes and includes a diagram with garment width, body length and sleeve length. I find these measurements very helpful when choosing what size to make.


The jacket that I’ve sewn is Pattern ‘l’ (lower case L) in the smallest size (size 1).

I made three pattern alterations. The first two of those changes where specific to my body – a forward shoulder adjustment and shortening the sleeves – and the latter was due to not being able to find matching ribbing. Yes ribbing… the cuffs in the pattern are supposed to be ribbing!

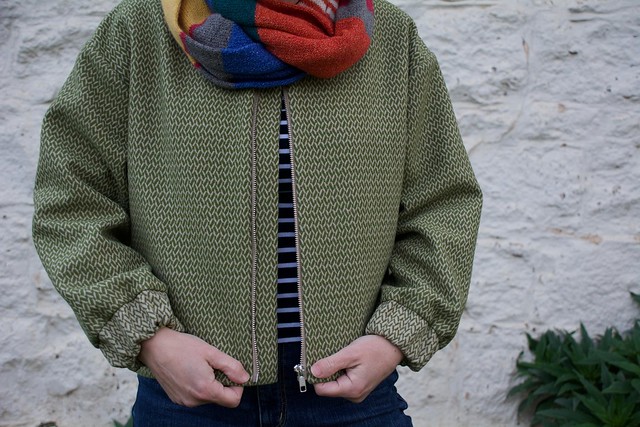
Instead of the ribbing I added an elasticised cuff. Did you spot that I used the reverse side of the fabric? I’m quite happy with how this alteration worked out. It helps the jacket maintain a bit of a sporty/bomber jacket vibe.
Can you believe that I had the perfect zip in my collection? It’s exactly the same colour and length that I used for my rust coloured Falda Jacket. And the reason that this zip was in my stash? At the time of sewing the Falda I had to order 5 of the same zip to get the colour/length that I required!
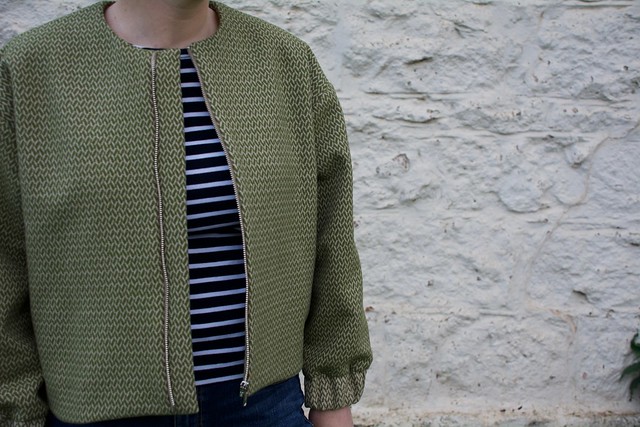
Now this is the first time that I’ve sewn a zip with a facing that wraps around and sits behind the zip. It’s actually a really neat finish and I felt rather pleased when I discovered how it worked. I often learn by doing!

The instructions didn’t specify, but I under-stitched all of the facings. Under-stitching is a favourite sewing technique of mine as it really helps elevate the finish on your garment with very little effort. As you can see above, the facings still need to be hand-stitched in place. I promise I’ll do that before I next wear this jacket!
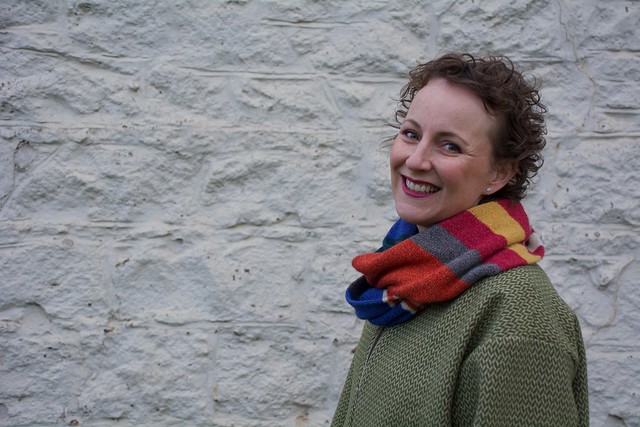
My final thoughts…
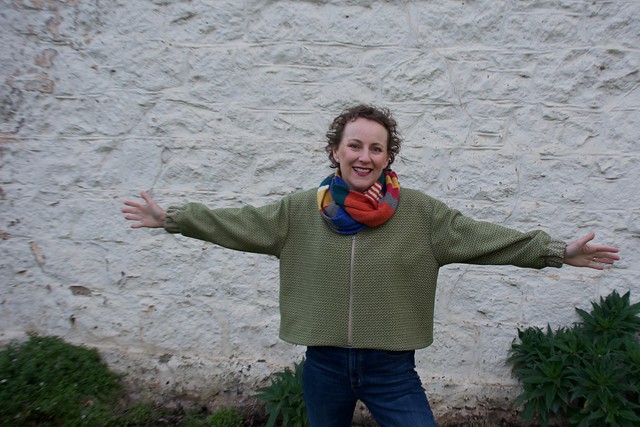
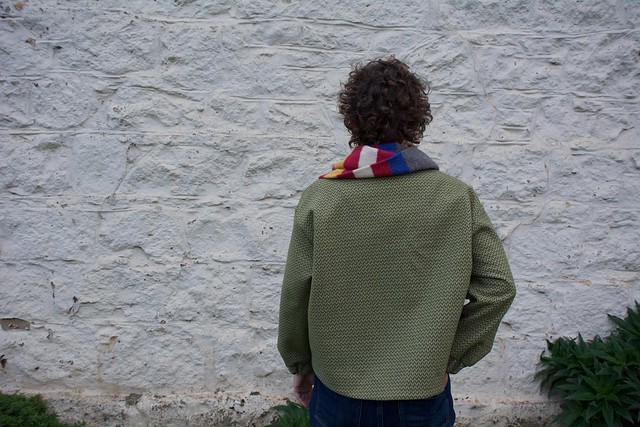
I love my new jacket, but I just wanted to reiterate that this pattern is very boxy and has a lot of movement and swing. I think the following photos capture the jacket in all its glory!


Pattern: Jacket l (lower case L) from ISBN978-4-579-11563-1
Size: Size 1
Fabric: Doubled-sided wool from deep stash (originally purchased from The Fabric Store)
Alterations: 3/8″ (1cm) forward shoulder adjustment, shortened the sleeves by 2″ and replaced the ribbed cuffs with elasticised cuffs made from the reverse side of the wool.
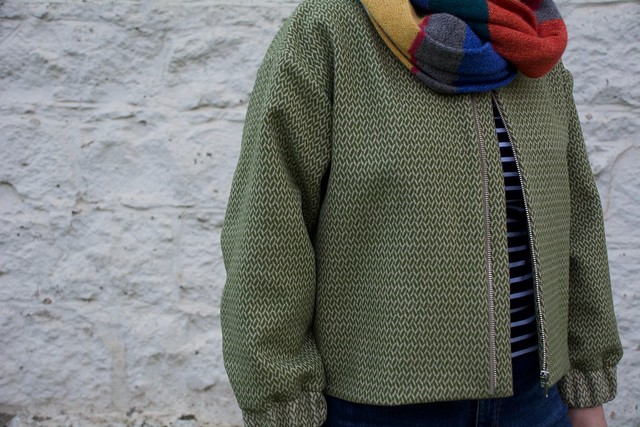
Outfit: Jeans from Witchery, Doctor Who Cowl and boots from Obus (last season).
Photo Location: Port Fairy

Wow just wow! That fabric is gorgeous (my favourite colour!) and the pattern lets it sing. Where do you buy these pattern books Anna?
My favourite colour too! I buy the Japanese pattern books from Kinokuniya a Japanese bookshop in Sydney or on Etsy from Pomadour24.
Jacket looks fantastic. I noticed the reverse fabric on cuffs straight away. Think they look better than ribbing. Deep stash diving is a great description which conveys the depths of one’s stash. Like the zip detail too. Great sewing , you will wear this jacket a lot! Great photos too!
I wore it yesterday and I think it’ll get another outing today!
Oh that’s a lovely zip finish alright! And love the contrasting cuff fabric. Nice work lady x
The contrasting cuff was Kim’s clever idea.
Hi Anna, I love this jacket and recently bought the pattern book. I didn’t realise there were no English instructions. I can figure out most of it, but could you tell me if seam allowances are included and if you interfaced the facings.
Hi Betsy. Both good questions. Have a look at the top right diagram on page 61. See how the facing pieces are dotty… this indicates the pieces are interfaced. There is also a stripe of interfacing on the jacket front to support the area where the zip will be installed… can you see the zoomed in diagram with this information? The stripe is placed 0.5cm from the raw edge. You need to add 1cm seam allowances to the outside of the pattern pieces where shown on the top right diagram on page 61. If you see a ‘0’ (zero) with a line touching the pattern edge, this indicates that you don’t add a seam allowance… for example see the bottom edge of the back neck facing. I hope this helps. Best of luck. Anna
Hi Anna, thank you for being so generous with your advice.