Struck a cord
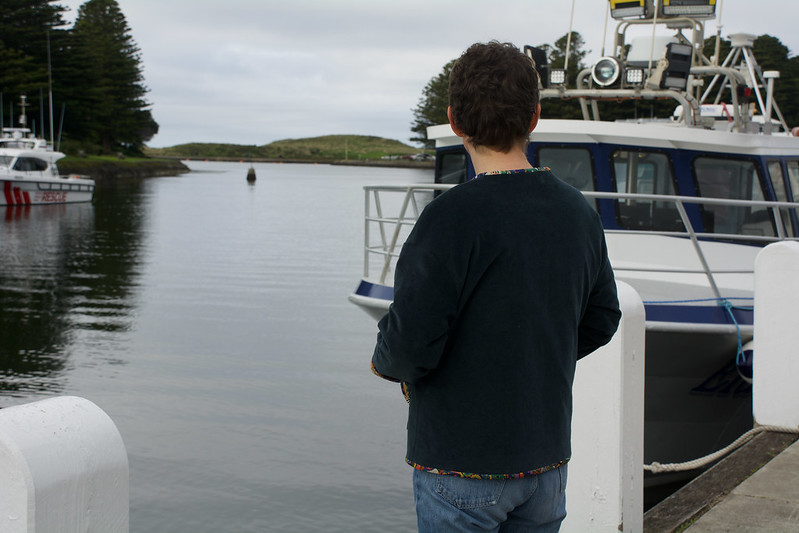
Cord, quilting and Liberty aren’t usually three things that you associate together in a garment, but I think this trio, with the help of Fibremood’s Molly Jacket, are a winning combination.

I often get asked if you can buy the Fibremood Magazine in Australia and unfortunately there aren’t any retailers here. You can either purchase a subscription or individually buy the patterns you are interested in. I am currently gifted a Fibremood pattern per magazine release, but I also purchase PDF versions of other patterns that I’m interested. Molly was a purchased pattern, not a gift.

Now back to this project… I purchased the pattern in March, settled on my fabric in early April, started quilting the lining mid June and completed the project this week while holiday in Port Fairy with my bestie Sharon and our girls.

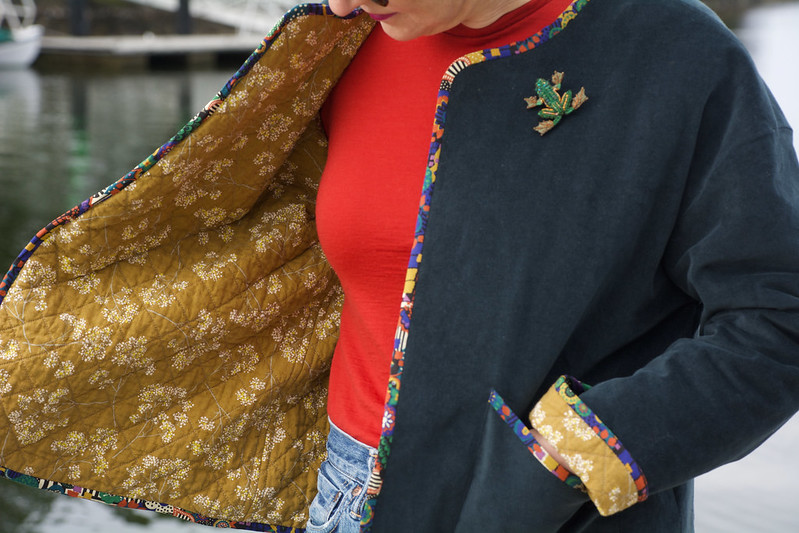
You heard right, I quilted the lining! It was a big, but enjoyable task. I cut my Japanese cotton into rectangles that were a little bit bigger than my pattern pieces. I then cut batting, and a cotton voile for the backing, to a similar size and spray basted the three layers together with the batting sandwiched between the cotton and voile. Using chalk and a quilting ruler I marked the quilting lines…. only doing small sections at a time in case they rubbed off. I find I get the most accurate results with chalked lines rather than using a seam guide.

Due to the thickness of the fabric to be quilted, I increased my stitch length from 2.5 to 3.0. My walking foot ate a lot of chalk (as seen in this reel) but that was easily all removed with a wash. Yes, after overlocking the edges of my quilted pieces I washed and tumbled dried them as I wanted to eliminate all shrinkage before sewing my garment. I also love the crinkly texture of a washed quilt.

I’m not going to lie… cutting out the jacket was nerve wracking. After putting in so much time quilting the lining, it was hard to take a rotary cutter to it! I’ve kept all my off-cuts and I hope I’ll be able to sew one or two little zippered pouches from them!

The sewing of the jacket was straight forward, but I did tweak things a little due to my fabric choices. As my lining was bulkier than the cord outer, I sewed it with a slightly larger seam allowance than the recommended 3/8″ (1cm). I also pressed all the seams open, and top stitched the seam allowances of the quilted lining in place. This proved to be tricky on the sleeves, but I got there in the end!
Before attaching the binding, I basted the outer layer of the jacket (cord) and the quilted lining together at the raw edge. The Liberty binding was machine stitched to the cord and hand stitched in place on the lining side. I find hand stitching gives me much more control… and I actually find it relaxing when I get into the flow.

And my final thoughts… I’m cock-a-hoop with this make!

Pattern: Fibremood’s Molly Jacket
Size: Small
Fabric: Cord, Japanese cotton used for the quilted lining and Liberty binding from The Cloth Shop.
Alterations: Completed a 3/8” (1cm) forward shoulder adjustment, removed 1″ (2.5cm) for the jacket length & removed 1.5″ (4cm) from the sleeve length.
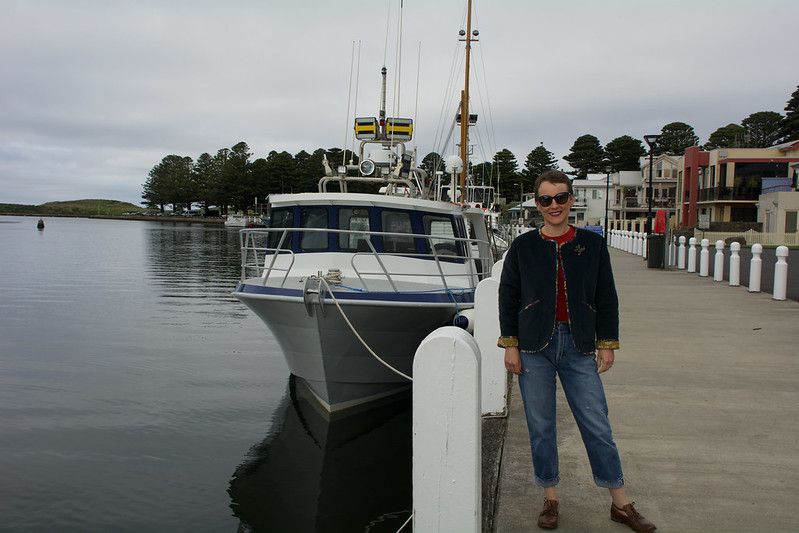
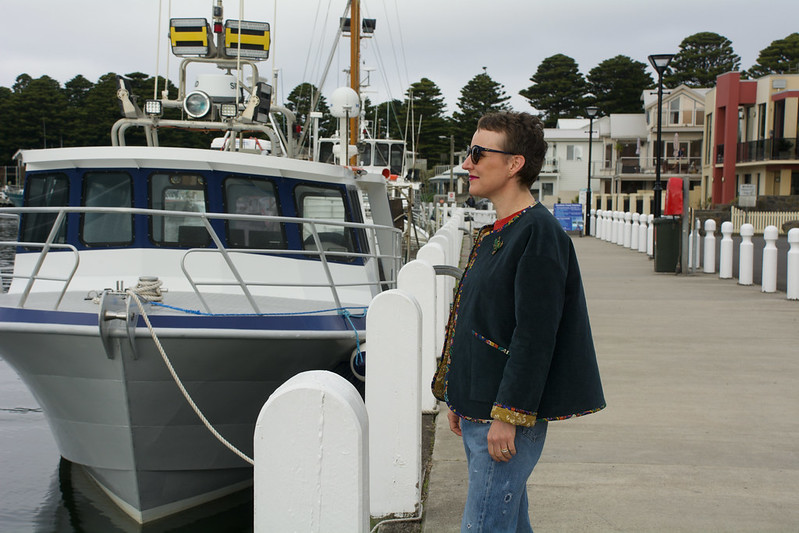
Outfit: Glacial Skivvy/Tee, jeans & scarf from Scarlet Jones and shoes & Trovelore brooch from Est.
Location: Port Fairy

Wow, this is a wonderful jacket. So much work went into it. And you are holidaying in one of my favourite places.
I’m really proud of this make… and yes, it was a lot of work. We loved out getaway in Port Fairy and I’m now holidaying on the Mornington Peninsula… I do love a winter beach holiday.
What a stupendous jacket. It looks amazing with the wonderful lining. I’m sure wearing such a unique item is a real boost!
I do feel super proud when I wear this jacket. It’s going to get loads of wear!
Very creative and beautiful workmanship
Thanks Barbara. Hewitt was my maiden name… you don’t see it that often!
Love you jacket. You have given me some inspiration. I have some lovely cord (blue of course). Job well done. Hope to see it in real life soon.
Thanks Marilyn. I’ll be sure to be regularly wearing it to work.
Hi Anna this garment is truly a labour of love. Thankyou for all the details involved in creating this jacket . It is worth the effort, it looks FANTASTIC and will be very useful and stylish . I love the background photos of Port Fairy too. Enjoy wearing such an original and well made garment . Cheers Pamela
It was totally worth all of the work. I’m really proud of this jacket and I just love to wear it.
So lovely and definitely worth all that effort! Xx
I’m pretty chuffed with this one.
What a great little jacket. Would be nice and warm too.
It’s very warm… which I am well pleased about. I feel the cold!