A thank-you tote
I have a tradition of making end-of-year teacher gifts. It makes for a busy end of November/early December, but my girls enjoy giving handmade items just as much as I enjoy sewing them. And they are ALWAYS well received. In many cases, I want to keep the present for myself… and this bag was no exception.
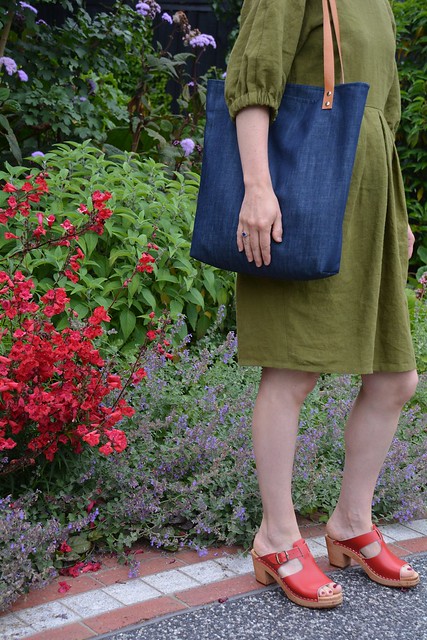
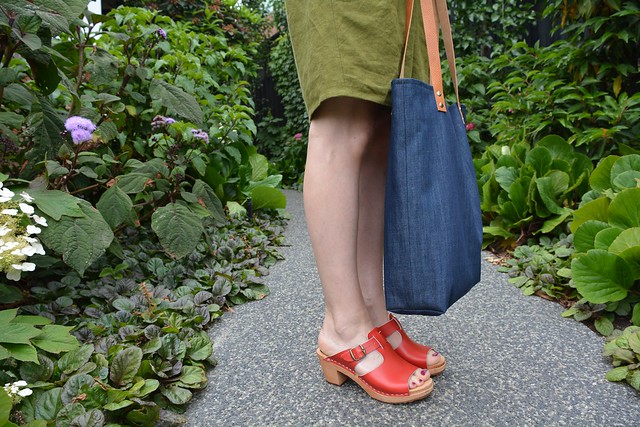
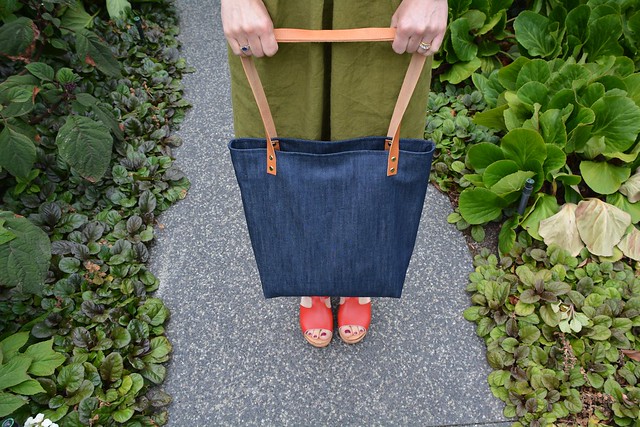
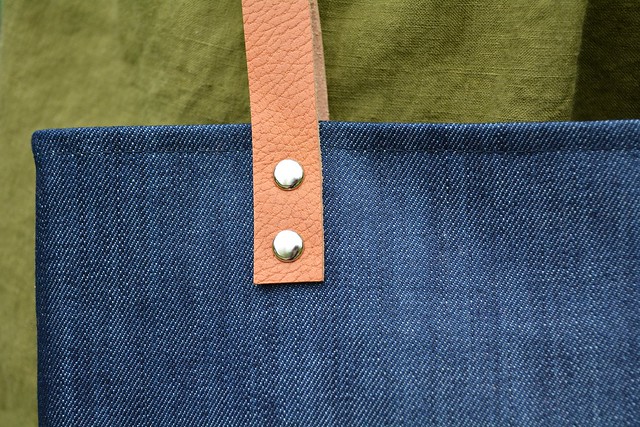
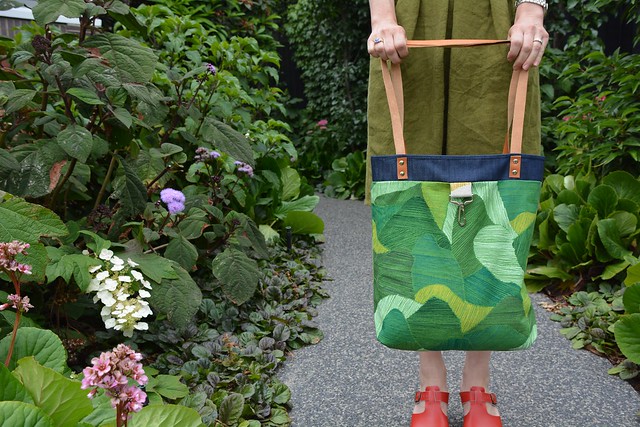
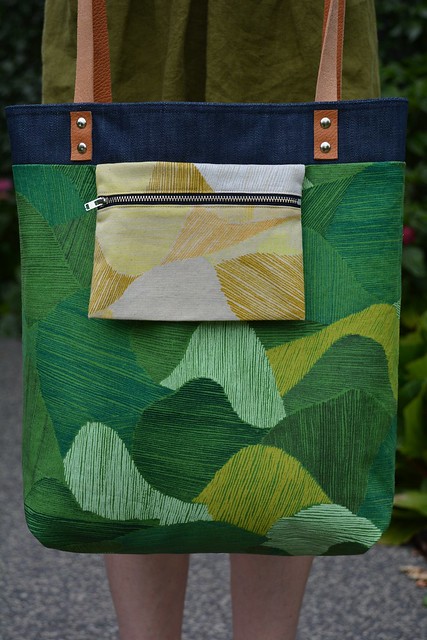
The tote pattern is my own, nothing too ground breaking really, but I think the icing on the cake are the leather straps. I purchased some satchel weight leather from The Fabric Store and cut the straps to size. This task was made easy by my leather strap cutter. My sewing machine is not a fan of sewing leather, so I opted to use double capped rivets to secure the handles to the bag.
I hadn’t worked with double capped rivets before, so there were some new skills to learn and some new tools to purchase. I made a special trip across town to Leffler Leather to buy what I required and they were out-of-stock of most of the rivet sizes and finishes. I always find Leffler’s overwhelming at the best of times, and it’s service is patchy, so I turned my focus to online shopping.
I found Adelaide Leather & Sadderly Supplies’ online store to be well stocked and easy to navigate. Being a rivet newbie, I had a few questions and their over the phone advice was exemplary. I purchased the rivets I need, as well as a two piece rivet setter & anvil and they were in my mailbox two days later. I smiled when I opened the package as they’d wrapped my items in bubble wrap and packed in into a recycled food box. Waste not, want not!
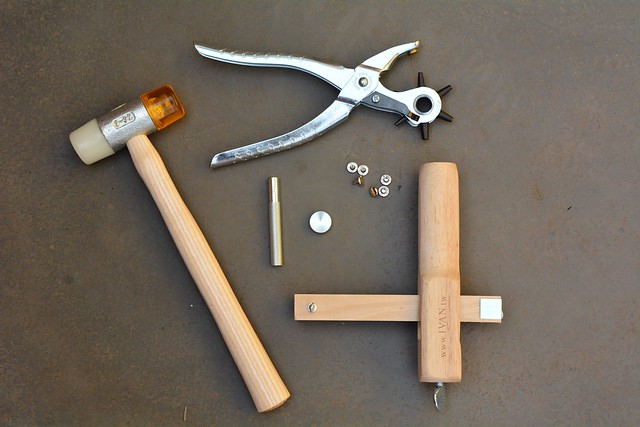
I learnt the hard way… breathe… that it is really important to use the right sized rivet for the job. The shaft of the rivet should be a few millimeters longer than the materials you are joining together. Speaking from experience, a rivet which is too long for the job creates a skewed red hot mess. Naughty words were muttered, tears nearly flowed.
I honed my bag making skills using patterns from bag making expert Nicole Mallalieu of You Sew Girl fame (see here & here). My three top bag making tips are:
- Accurate cutting of pattern pieces makes for easier sewing
- Grade your seam allowances to reduce bulk. It really does make a difference
- Secure the bag lining to the outer fabric within the seam allowances of the boxed corners
I’ve been keeping a secret… Nani Iro innards!
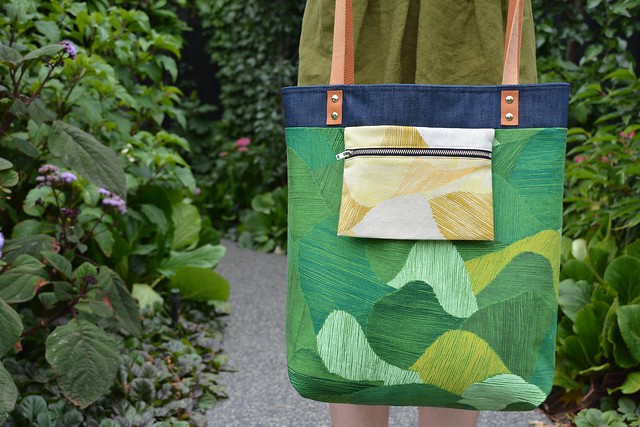
I feel like I broke some bag making rules, but I didn’t use any interfacing or fusible fleece on this bag. I was after a bag that was sturdy, but still soft. In my eyes, the denim is a hard wearing outer and the cotton/linen lining adds a little more structure without it being stiff. And let’s be honest, who wouldn’t want to look inside their bag and see such beautiful fabric?
I see more of these totes in my future… yes plural. I’ve even purchased some more Nani Iro fabric from Kelani Fabric. Here’s hoping I might get to keep at least one tote for myself!
Pattern: Self drafted tote bag
Size: Na
Fabric: All remnants… the denim was from Rathdowne Fabrics, the Nani Iro was from Tessuti & the leather was from The Fabric Store.
Alterations: Na
Accessories: Funkis shoes… brought ‘as new’ from a local recycled clothes shop
Photo Location: My garden

What a great looking bag! The leather handles and rivets are very professional looking. And of course the nani iro lining is a wonderful surprise.
Thanks Noelle. You commented on all my favourite aspects of the bag. I have brought more denim so I’m ready to get a little bag production line going.
Great tote! As a former teacher, this would be a welcomed gift!
I imagine that the boxes of chocolates, wine, soaps, hand-cream etc… would get a little tiresome after a while.
Such a great present! And I absolutely love the little zippy pockets you added, so much better than the patch pockets I usually add to bags. Thanks for the inspiration 🙂
I will confess that the zippy pocket idea was borrowed from a bag I brought in Germany last year. I look forward to seeing these added to your next bag projects.
I want this bag and I want to make this bag! It’s really nice! Everything is finished so well. Great work!
Thanks Kelley. I’m really chuffed with how it turned out.
It’s smashing! Now you’re Queen of the Rivetor there is no stopping you! Love those clogs!
Now that I’ve mastered the rivet, maybe I should attempt to make clog next?!
The careful attention to detail in this bag is wonderful.
It really was a joy to sew Anna. I feel this tote making caper might be quite addictive!
What a bag. It’s beautiful inside and out. Well done on mastering the rivets.
Thanks Louise. At times I thought it was a shame to have the beautiful Nani Iro on the inside. Maybe I’ll have to re-jig things and make my next version reversable.
Oh envy. Playing with leather tools. Such a thoughtful and well crafted teacher present.
Leather is fun to play with Klarissa. Have you dipped you toe into the leather work yet? If not, I’m sure I can lead you astray!
Seriously gorgeous Anna. It really makes me want to make one!
Thanks Rachel. If you do, I’m more than happy to supply the handles and rivets.
Oh my gosh I will PAY you to make one of these for me! I love the Nano Iro guts so much I think I’d use it inside out, and I adore denim! So fab lovely one, you clever thing, you.
Gorgeous bag!
I have bought that Nani Iro fabric to make a dress…but it looks so cool in your bag…don’t think I can give up my dress idea though.
Your straps and rivets look so professional. A very covetable bag.