Canberra Frocktails : Clutching leather
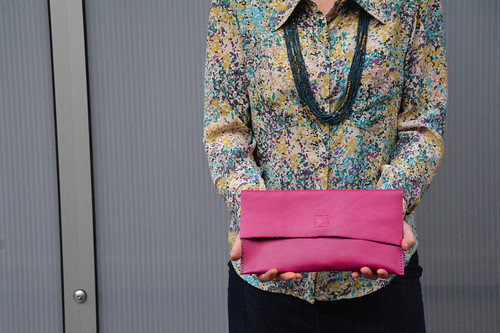
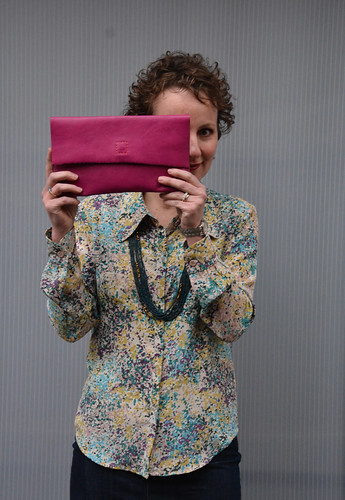
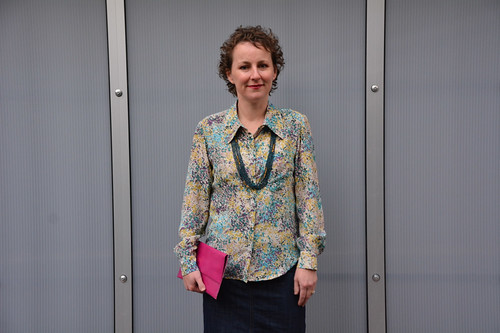
As soon as I decided I was going to Canberra Frocktails I had a vision of a silk dress, a leather clutch and some knock-out heels. Making the dress was a no-brainer (it was a sewing gathering after all!) but I decided that I would ‘have a go’ at making the leather clutch. It was time to learn some new skills!
With no real leather-making experience I trawled the internet and Pinterest for inspiration, tips and tricks. I soon decided that a zippered clutch was out of the question as my sewing machine wasn’t fond of sewing leather… even if I used a leather needle, top stitching/embroidery thread and a long-stitch length. I’ve since learned that a walking foot might solve all my problems… so I’ll be testing out that theory soon.
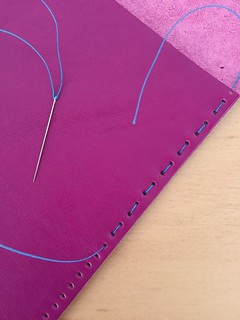
As using a sewing machine wasn’t on the cards, punching the holes and hand stitching stitching it together was the next best option. I’ve recently subscribed to Creativebug and the leather classes were really helpful. Little tips like using craft glue to secure the two layers together before punching the holes, were gold.
After checking out the leather on offer at the NSW Leather Company (they have a showroom in Collingwood) I ended up buying from The Fabric Store as they are able to cut some some hides and this magenta had my name on it!
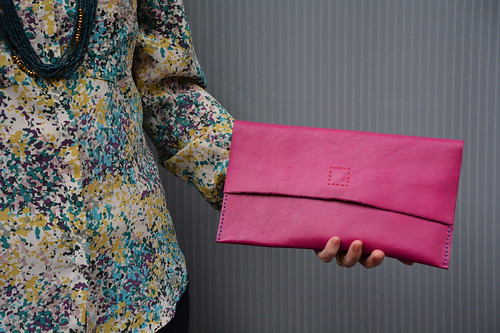
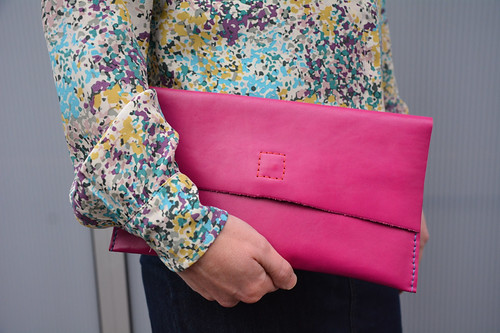
I designed my clutch myself, ensuring that a mobile phone, credit-card sized purse, hankie and a room key would fit. I mocked-up a paper version to test the size and then cut my leather with my trusty rotary cutter, quilter’s ruler & self healing mat. The edge of the flap is actually the natural edge of the hide and I really like how it softens the whole look.
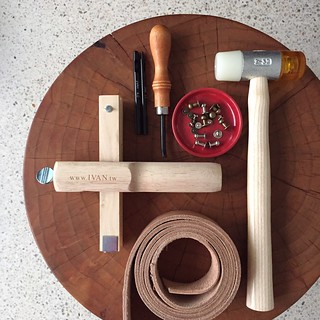
My leather tools (hole punch, hammer & some other things for another project) were purchased at Leffler Leather. Leffler’s also have a huge range of hides and let’s face it… all things leather!
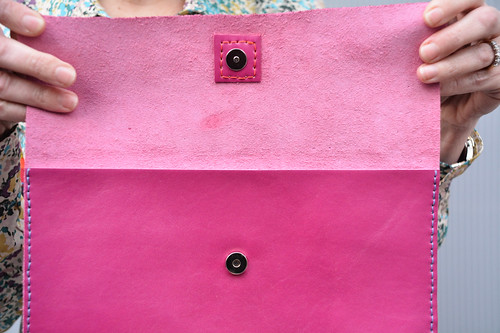
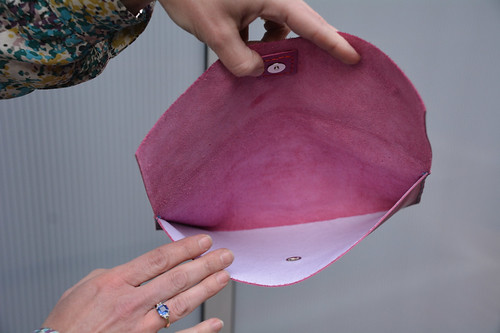
With my leather purchased, my how-to research completed and the template sorted…. well that just left the closure. This is where my previous bag making experience (see here) came into play. I opted for a small magnetic clasp which lead to a little bit of ‘making it up as you go’ crafting.
The clutch wasn’t going to be lined and the areas where the magnetic clasp are attached (remember there is a front and back to secure) requires interfacing. My solution was a little square of leather sown on the inside of the flap, hiding everything underneath, and creating some decorative top stitching on the front. I was pretty pleased with my solution… I mean design feature!
The other on-the-fly decision was to add interfacing to a portion of the leather to give the clutch some much needed structure. I have no idea about the ‘rules’ when it comes to interfacing and leather… I just did my own thing. This is one of the benefits of being a newbie! After testing it out on a scrap of leather, I ended up using 100% cotton fusible interfacing which is sometimes referred to as buckram but is I purchased it from Clegs under the brand/product name Shapeform. I only added the interfacing to the section of the leather that became the inside of the clutch pocket (the bottom third of my piece of leather).
Jillian also made a clutch for Frocktails (did I mention that I was in fine company?) and she stitched a thinner piece of leather to line the back of her clutch and add structure. Something I’ll definitely keep in mind for next time.
I brought waxed linen thread for this project from Luccello. I used orange for the design feature and a bright blue for the rest of the stitching. If the truth be told, I’ll be looking for slightly thicker waxed linen for any future leather makes. I used the smallest hole punch available and I would like the thread to ‘fill up’ those holes a little more than they did on this.
I can attest to having caught the leather making bug. Currently, I’m dreaming about making a leather tote. I wonder if it will become a reality?
Leather: The Fabric Store
Leather Tools: Leffler Leather
Thread: Waxed Linen Thread from Luccello

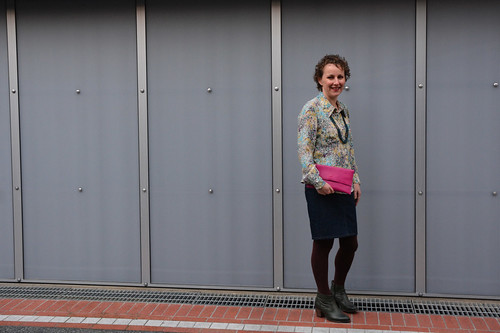
[…] my accessories for the night… a leather clutch made by me, some rather lovely but impracticable shoes that were difficult to walk and even stand […]
Oh swoon! That clutch is divine!
Thanks Sarah Jo. I’m quite chuffed with how it turned out… beginners luck?
A smashing success!! It will be sew handy to use.
It’s the perfect clutch size Tammy and I love that it will provide a nice pop of colour to an outfit.
Love this… nice outfit too – you look good in skirts!
What eagle eyes you have Helen. Straight, short skirts do suit me but I don’t wear them often. I must get around to making a moss mini…
Love the closure solution. Beautiful!
Thanks Sarah. I love how information for this project came from many places including past experience. My 8 year old now thinks I should buy her some leather so she can make herself a clutch!
So. Damn. Awesome.
Oh shucks…
I love this so much – well done!! Thanks for posting your stabilisation solutions for the magnetic closure as well, very much appreciated 😉
My pleasure. You’ll be whipping up things in leather yourself in no time!
Fabulous is there anything you can’t make?
My bed! Life it too short for bed making…
You are so talented Anna, it’s a wonderful bag and the fastening finishes it off nicely.
I’m just waiting for your post telling us how you also made those fab shoes!
Sorry to disappoint Janette but the shoes were purchased. Shoe making, bra making and sewing jeans are all things that I prefer (at this stage) to buy at the shops.
So fab Anna! I was looking at your punch holes again and I think you could get smaller. The four prong fork device I use might give smaller holes, but they are not truly round, rather rhombus/parallelogram shaped. You can’t tell once stitched but it might not be to your preference. Oh and I have to teach you saddle stitching with two needles!! Thicker thread can end up looking a bit rustic in time, so keep that in mind. The nature of the linen thread means it’s obviously somewhat delicate. My shoulder bag stitching can get a bit raggy looking in places that get a lot of “rubbing”. But I think yours is an absolute winner – and I’m going to go now, because really I could just give you a call for a chat rather than wax on and on here 🙂
Miss 8 has convinced me that we need to go to the leather shop tomorrow, so I feel that I will be adding the four prong thingo to my kit. And yes, I must get into sandle stitching. The info on the waxed linen is very helpful Feel free to wax on here or give me a ring anything 🙂
It’s gorgeous! I was seduced by some soft yellow leather when I went shopping for scraps for my duffle coat toggles. I have visions of a simple tote but haven’t quite got there yet. I love your contrast coloured stitching, particularly!
A tote it definitely next on my leather making adventure. I’m going to have a look at hide tomorrow. Exciting times!
[…] only) Size: 11 Fabric: Silk crepe de chine from Emma One Stock Alterations: NA Accessories: Handmade leather clutch, beads from Scarlet Jones and shoes purchased at […]
That takes me back to hand sewing a horse halter when I was in year 8. My friend and I were so proud of those halters. I’d definitely be up for trying this one day. Thanks for the inspiration.
A horse halter… is there anything you can’t do wonder woman? When are you coming over for fruit cake?
So very clever! I really enjoyed leatherwork on high school, still use saddlestitching occasionally to fix a bag or shoe! I just use some topstitching or heavy linen thread run through a piece of beeswax. Leather work is coming back in vogue, have seen patterns for small projects, as well a kits for sale ( make a bag, assorted styles) etc in several UK craft magazines such ad Mollie Makes and “Making” .
Hi Dianne. It sounds like you have all the skills to get stitching with leather. I went to look at hides yesterday and I must admit I got a little overwhelmed and came home empty handed. I’ll do a little more research and hopefully will feel brave enough to purchase next time.
I’ve been looking forward to reading about your escapades with leather! What a lovely (and bright!) creation. I’ll admit I’ve seen some absolutely stunning leather bags made by Etsy-ans, and wondered… how in the hell? Obviously, having the right tools goes a long way! Was it difficult finding suitable hardware, like the magnetic clasp? The fasteners used by Jillian have my curiosity piqued. It’s a gorgeous clutch – and I await eagerly the next project!
[…] Canberra Frocktails rolled along and both Jillian and Anna had MADE their own leather clutches, I knew I had a new challenge! Hand – made – […]
[…] buy nothing new! And the report card… I succeeded. I even trotted out the leather clutch that I made for Canberra […]