Hemming tricky knits
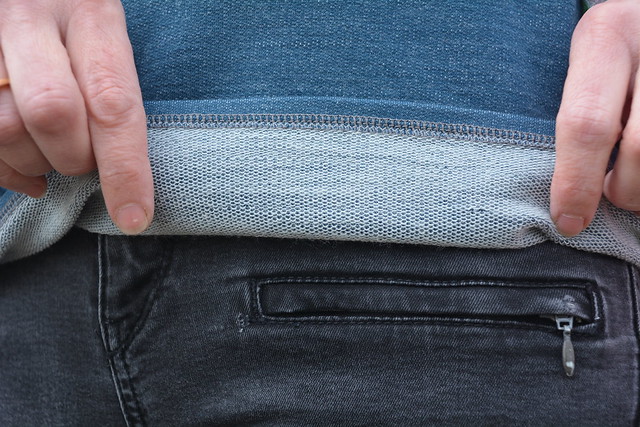
The merino french terry that I recent sewed of M6992 (View D) is a delicious fabric, but I knew it had the potential to stretch out when hemming. I therefore threw all my hemming tricks at it. For those who are interested, I’ve recreated the steps below:
Step One: Stablise The Hem
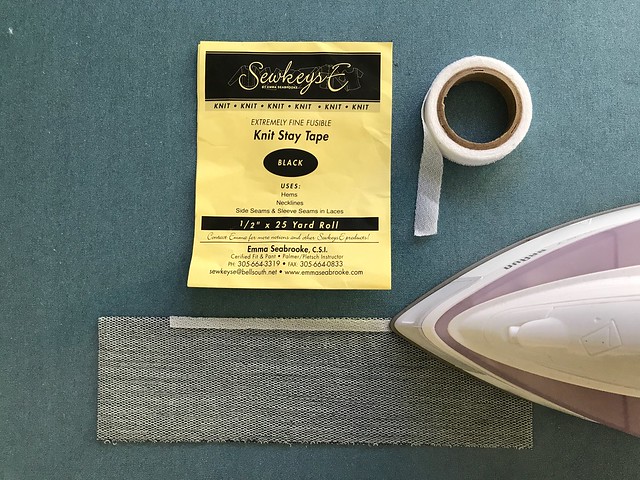
I’m a big fan of stay tape, and my favourite is Emma Seabrooke’s SewKeysE Knit Stay Tape. This product is getting harder and harder to source in Australia, but you can make your own stay tape or your local fabric store may sell Vilene Stay Tape, in a few different widths and colours, by the metre.
Stay tape is fusible on one side (the rougher side) and is applied with dry (or low steam) medium heat. Always test on a scrap of your fabric first.
Apply the stay tape to the raw edge of your hem. I trimmed the width of my stay tape to 1/4″ (7mm) which is the approximate width of overlocking.
Please note, stay tape does exactly as the name suggests… it holds the fabric in a set position so it doesn’t stretch out. Please don’t apply stay tape to hems that require the ability to be stretched. I learnt this the hard way several years ago when sewing leggings for my girls… they couldn’t get their feet through the leg openings!
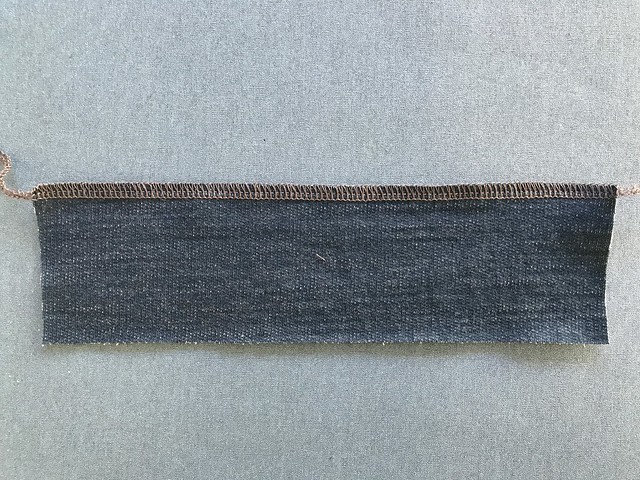
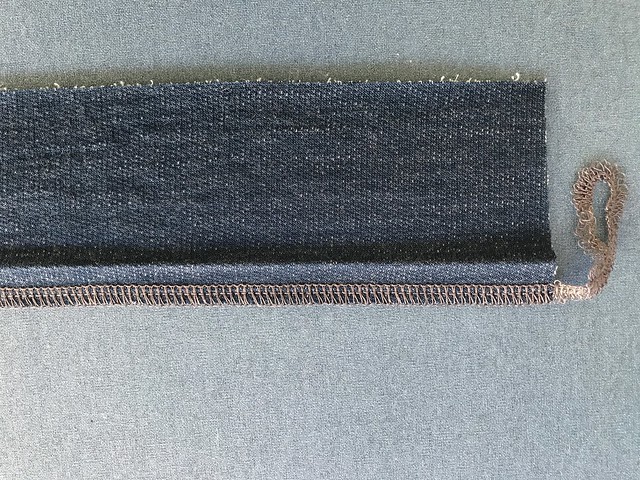
Step Two: Overlock The Raw Edge
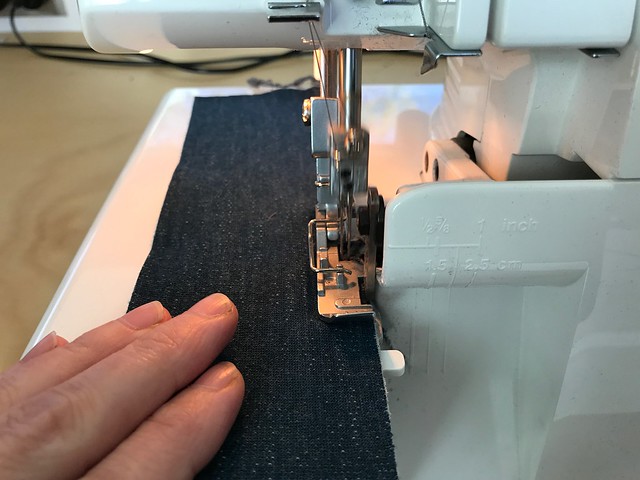
Overlock the raw edge of your hem. You can skip this step if your fabric is not prone to fraying.
Step Three: Glue The Hem
I love hemming tape as much as I love stay tape! What is hemming tape you ask? It’s glue backed paper.
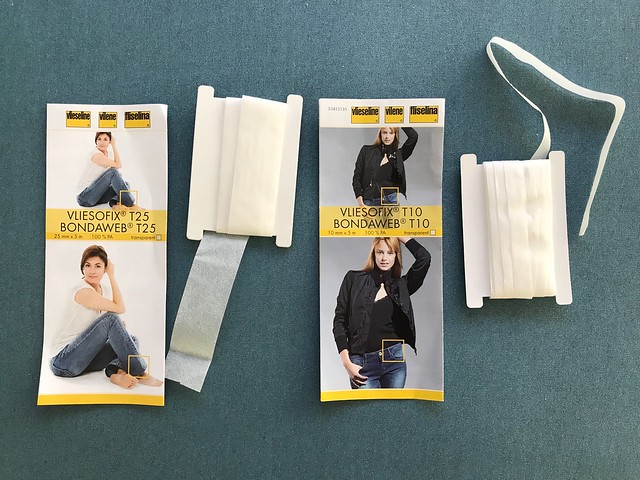
Vliesofix (sometimes known as Bondaweb) is my product of choice. It comes in three different widths… 1/4″ (6mm), 3/8″ (10mm) and 1″ (25mm) and I use the T10 and T25 (pictured above) the most.
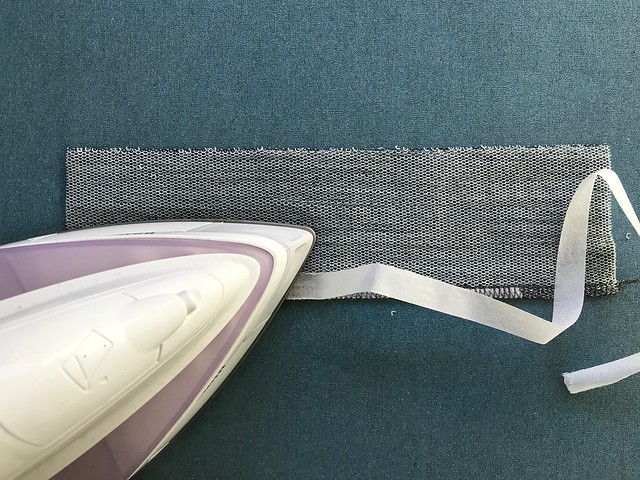
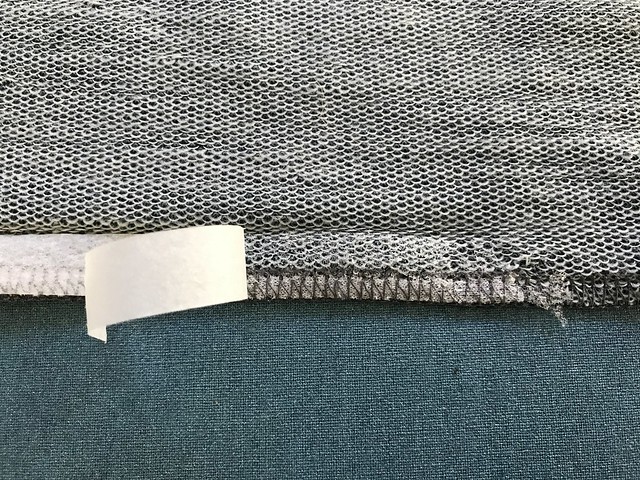
To apply the hemming tape:
a) Use the tape matching your required hem width. On the wrong side of the fabric, iron the tape to the edge of the hem (smooth side up, rough side down) using a dry (or low steam) medium heat.
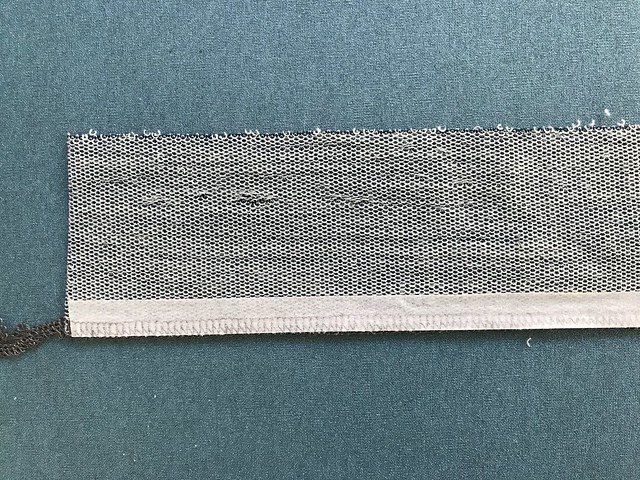
b) With the tape still in place, fold the hem up, using the edge of the tape as your guide, and iron in place.
On the right side, you now have a defined hem fold line.
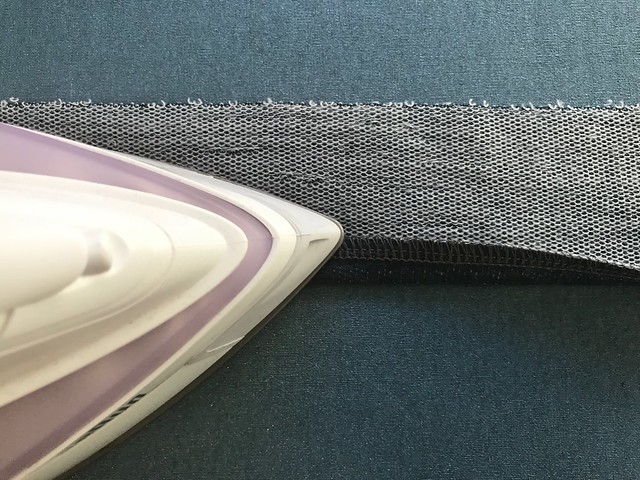
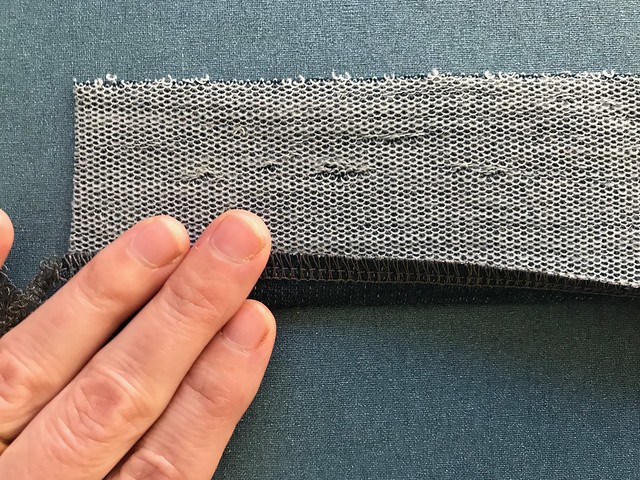
c) Remove the backing paper.
d) Finger press the hem in place. The glue should still be a bit warm and tacky, but if it isn’t, you can jump to the next step.
e) Iron the hem to fully activate the glue.
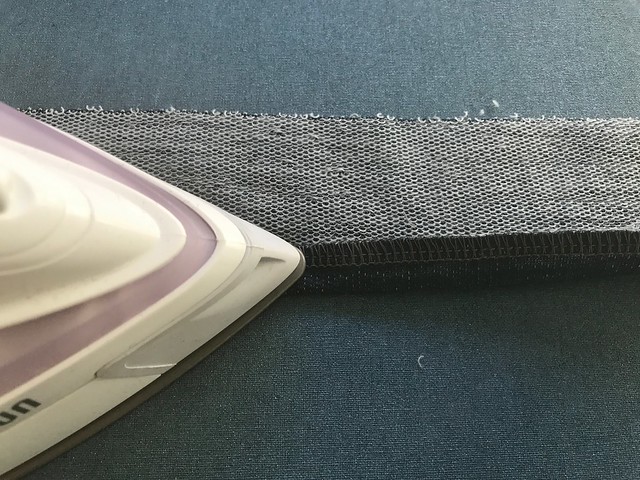
f) If any adjustments are required… reheat the glue with your iron, gently separate the fabrics, re-position them and re-iron them in place.

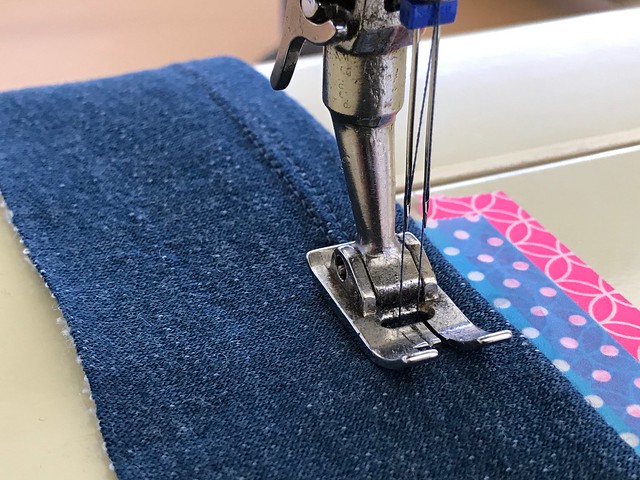
Step 4: Stitch The Hem
Once the hem is glued in place, the hemming is oh so easy.
I’m a little big fan of securing hems with a twin needle. I’ve had great success with using woolly nylon thread in my bobbin, a trick I learnt from Shelley.

As you can see, a using little bit of washi tape as a guide makes stitching from the right side and catching your hem underneath a breeze.

Step Five: Admire
Now you can just sit back and admire your perfect hem… inside and out!
I have some of that stay tape and it is wonderful. I should send it to you since it’s languishing in my sewing box! Very thorough tutorial–no wonder your knit garments have such beautiful finishes!
That’s very kind of you Sarah, but hold onto it as it will probably cost you more in postage than the tapes worth. Plus, your interest (or should I say time to engage in hobbies) might just have you back sewing sooner than you expect.
Thank you for writing such a helpful post. I am much more inclined to sew with woven fabrics because I dread having to hem knit fabric.
Knits do kind of have a fear factor about them as they are a little less predictable than wovens. I found that once I got into the swing of sewing knits, and found a few products – like the stay tape and paper backed glue – that made life easier, I happily switch between stretch sewing and woven sewing whenever the need or mood arises.
Nicely done- both the idea and the post, thank you!!! Will have to look for some stay tape. Like the idea of using washi tape for a guide, I sometimes use a post it but they don’t stay on for long!
Washi tape is a little bit life changing Dianne. I’m in conversations with a couple of retailers about stocking these products (Stitch 56 used to have them but they are closing down – boo hoo). I’ll let you know if I have any success.
Yay Anna, nice one. Thanks for the shout out again. Woolly nylon and bobbin tension us the first 80% of getting it right IMO. I think overlocker the raw edge can have a bit of a stabilising effect, especially if you set the differential feed to ensure no stretching of the hem line, maybe even a tiny bit of contracture…
I must remember to use the fusible web or stay tape when I’m hemming a skirt or dress for me. Most of the time I’m doing cuffs or kids hems that need every bit of stretch to avoid breaking so I leave out any stabilisation.
I must confess that I haven’t played too much with the differential feed on my sewing machine… maybe that’s another good post for you to write (pretty please) as contracture would be awesome on a curved hem. I’m going back to my post to add a bit that you only stablise a hem if no stretch is required. I found this out the hard way with a pair of kids leggings several years ago! There is always so much to learn.
Nice post lady… do you think it’s essential to have the full thickness of the hem fused? I’ve used steam a seam lite, which seams similar to the vliesofix but doesn’t have the variety of widths…. so I’ve just used it right on the edge of the fabric that gets stitched…
It’s not necessary, but if it’s the exact hem width (I’ve been know to trim the paper backed glue with a rotary cutter and ruler) then there is no measuring involved. I’m all for making life easier.
I wonder if you can help me. On some knits, my twin needle skips stitches often, but only on the left needle. I finally got it to quit doing it 99% of the time by using tissue paper under it and then tearing it off.
I have a nice Bernina
It is serviced regularly
I made sure thenlint was cleaned out
I used the knit stay tape you use
I tried changing the tension and the stitch length
The needles were new.
I threaded it under the little bar on the machine ( which I never do. I think it is for free motion stitching or embroidery)
Do You think I will always need to use some kind of tear away stablilizer when hemming these slippery, stretchy knits? If so, what would you recommend?
The other day, I couldn’t get it to not skip at all. I think the tissue paper I had was thinner and the knit was. Poly/elastane. I finally did two rows with single needle: a longer length and a slight zigzag. It works, but doesn’t have as much stretch or look as nice.
I hope that makes sense. Thank you.
You have been very thorough and thought of everything that I would have suggested. I have used a ‘Tear Away Vilene’ (https://www.tessuti-shop.com/products/white-tear-away-vilene) before on silk and it worked well, so I assume it would translate nicely to slinky knits. I hear you frustration and I’m sorry I can’t help further. Could you return to the place you brought your machine and ask for their advice?
Thank you. That is a good idea. And I can return to the shop and take my machine etc.
Just curious – is your twin needle a ball point or universal? My machine skips on knits if I don’t use a ball point on natural fibres or a stretch needle on those with a high Lycra content like performance knits…..might make a difference for you!
It is a universal. I will
Have to try a ballpoint next time. Thank you.
Wow! I’ll definitely be referring to this. Thanks!
My pleasure Kate. I hope it’s helpful.
Thanks for this. (Apart from not having an overlocker) I’ve tried most of these tips separately, but not integrated in the full assault on tricky knits that you have demonstrated. I’ve got a big fail sitting in my basket that I’ll now have another go at.
As a PS for those reading who are nervous about knits, most knits are super easy to sew & don’t require this sort of special handling.
That’s an excellent point Karey… most knits are very friendly and the more stable they are the easier they are to handle and sew.
Hemming knits is the bane of my existence. Mostly, they have been flipping up, which I think is because they are too narrow. Does the combination of the stay tape and hem tape resolve this? I felt good about the width of the hem (which I thought meant I didn’t need stay tape). Ugh. Before I invest any more in the process (more notions, more time, etc), it would be so great to have a good resource to consider.
Hi Erin. All fabric behave differently. I would suggest investing in the hemming tape first (the stay tape is only for knits that stretch out when you just look at them!). I’m wondering if the ‘flipping out’ is because the tension on your stitches is too tight? Unfortunately I think it’s a trial & error situation where you’ll need to see some test samples on scraps of fabric. I wish I could be more helpful.
Thanks for the great post! It was really helpful and delightfully concise! Anna, should I sew though the hem tape? Or just along side of it?
Hi Cynthia. You remove backing paper on the the hemming tape before sewing. I hope this helps.
Can anyone recommend a stay tape available in the United States? Thanks!
This is a very helpful post – thank you Anna! I read Shelly’s post (great) and I wonder if you change your bobbin case tension, or the whole case as Shelley does? (I believe that you have a Bernina?)
As Cynthia commented, I’d also like to know if something similar exists in the US. (Products I’ve used here seem ‘different’.)